Tendenci AMS Content Management System uses the TinyMCE WYSIWYG Editor to enable you to upload and embed image files on your website's pages, articles, news, events, and other content modules. This Help File will explain how to upload and embed images inside of content that will display as images on your website. For best practices for images, please visit Google Search Central on YouTube and watch the video SEO for Google Images | Search Central Lightning Talks. Keep in mind that your Tendenci site has all the SEO tools you need to keep your images and web pages healthy!
First, we'll talk about uploading images that are stored on your computer, and then we'll talk about how to obtain and embed images that are currently stored in the files module on your Tendenci website.
Uploading Images Using the TinyMCE WYSIWYG Editor
Tendenci will allow you to embed the following common image file types:
- types = {'image': ('.gif', '.jpeg', '.jpg', '.png', '.tif', '.tiff', '.bmp'),
Example of Tendenci Open Source code for image file types is found here https://github.com/tendenci/tendenci/blob/master/tendenci/apps/files/utils.py#L545
We recommend you resize images before uploading and embedding them to keep them under 500 x 500 pixels. Images larger than that will load more slowly each time a new visitor comes to that page. That means the image will take longer to display than the rest of the text and can decrease your visitors' online experience.
When you upload the image file through the WYSIWYG Editor's "Insert Media" option, Tendenci saves the image in the Files Module and assigns a unique URL for the image that you can navigate to from a web browser to find and download the image. Don't forget to apply SEO best practices to your images for a healthy website!
Uploading images that are stored on your computer
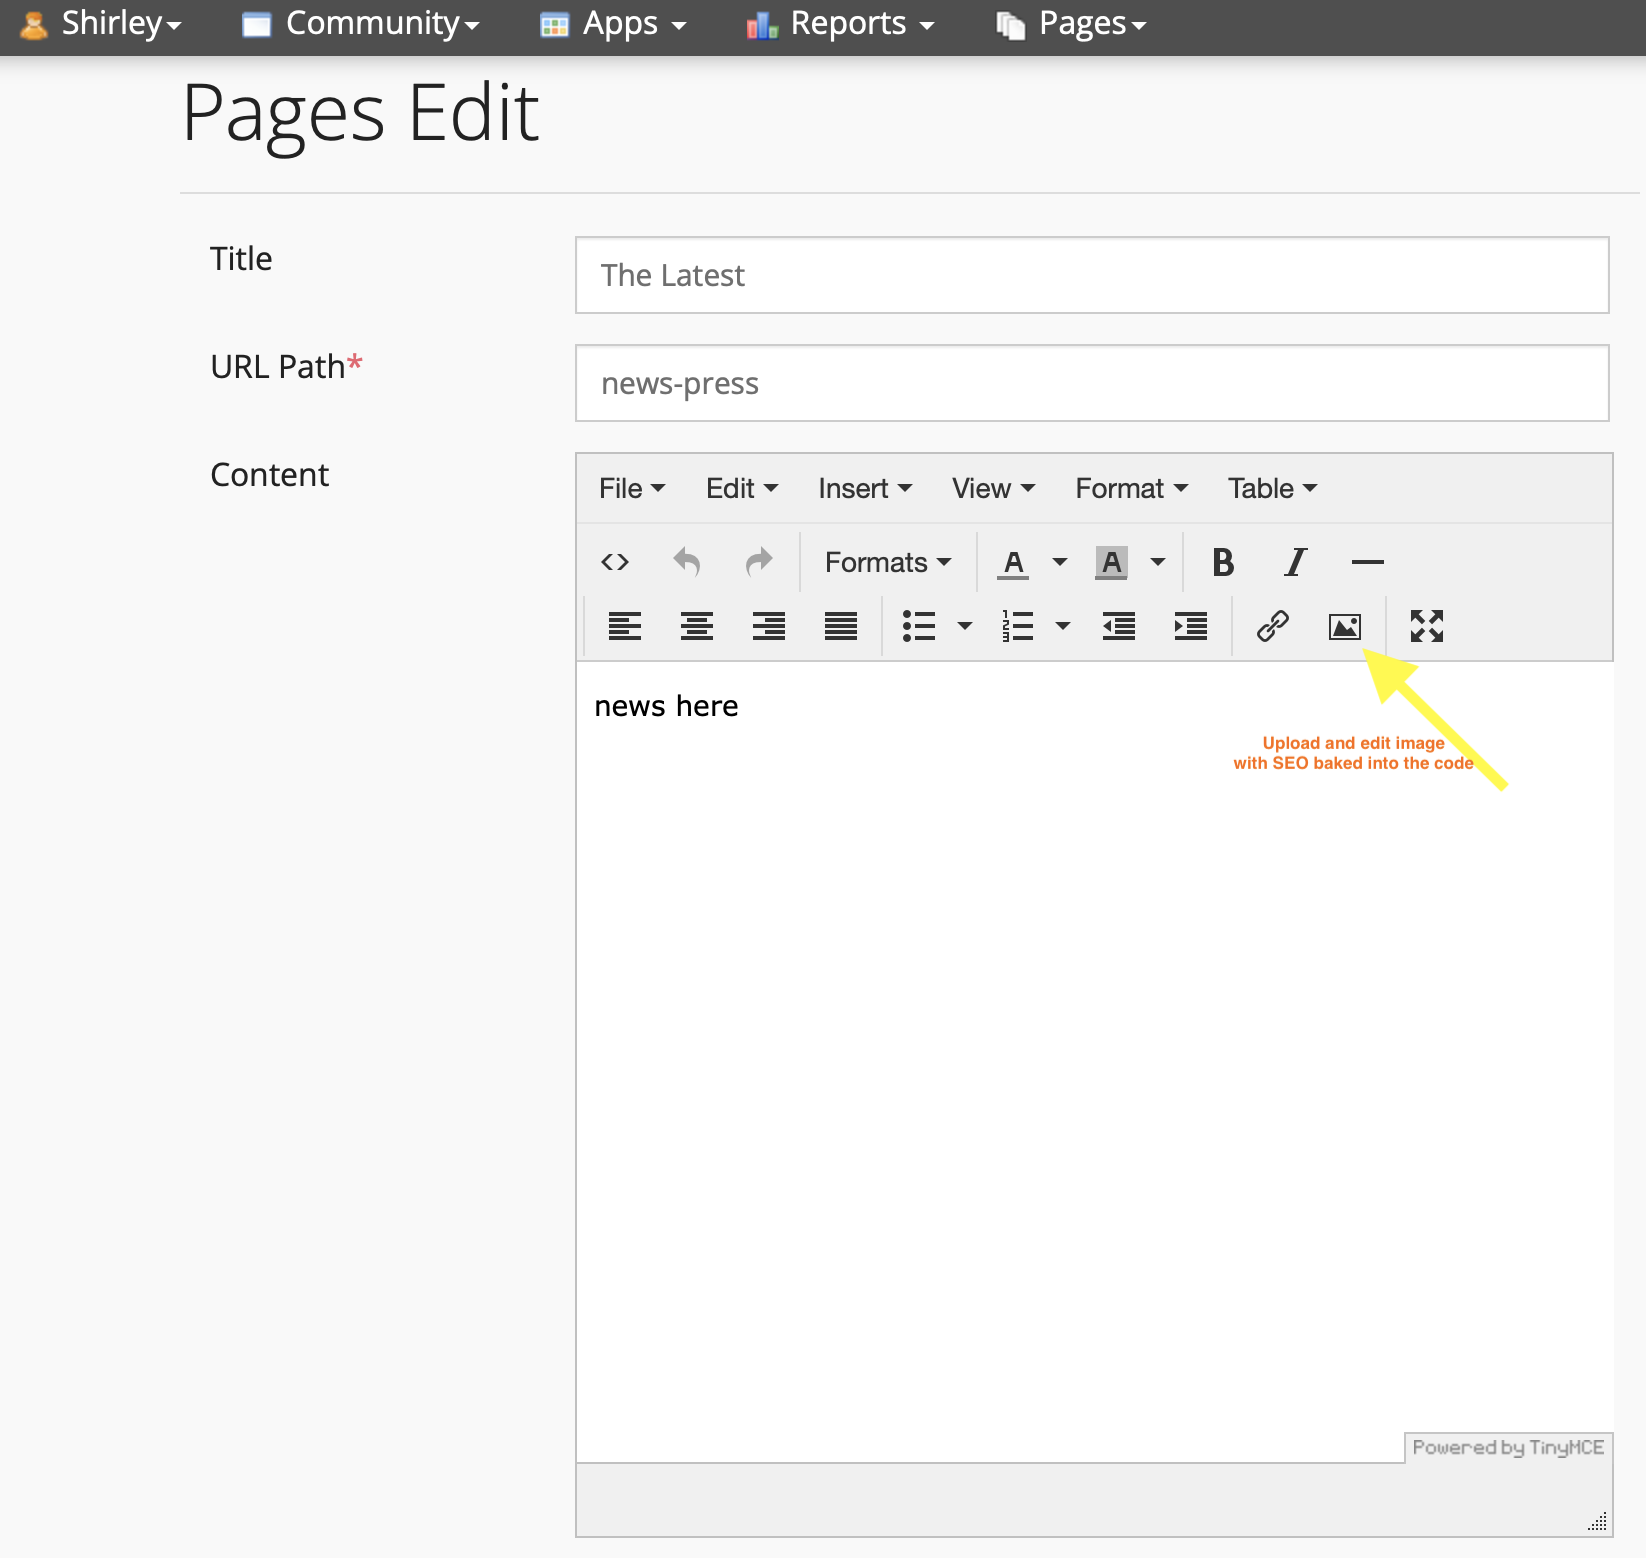
Navigate to the content edit page where you want to upload and embed the image. Click on the Insert/edit media WYSIWYG icon and a box will pop up.
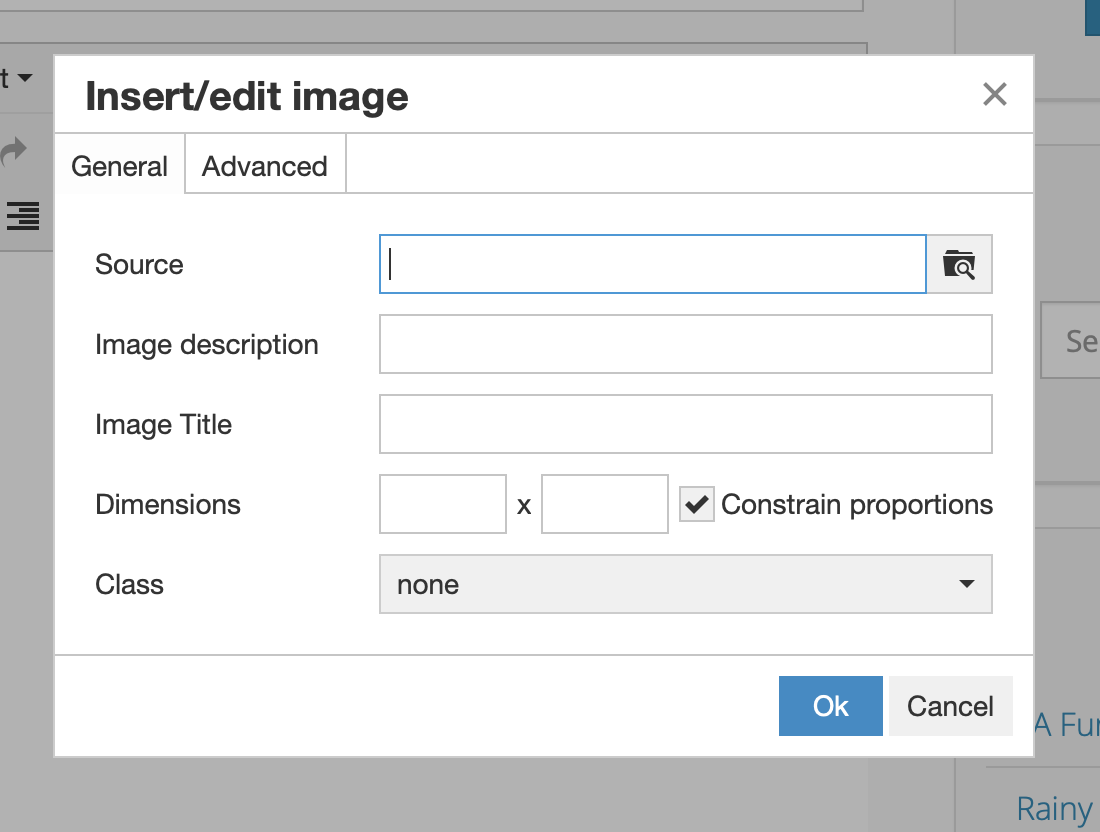
Select the file icon in "Source" to choose to upload an image from your website's gallery or from your computer. For SEO best practices, please make sure to rename your files relevant to the page and to search terms that relate to the image. Renaming your files properly also helps you search for them in the backend of your Tendenci website.
Select "Upload" to upload images from your computer. Or, you can also "insert" files that have been uploaded to your database by selecting "Insert".

For more details on optimizing your images, please check out the following help file How to Optimize Your Images
SEO Best Practices for Images
An important tip for image faster loading time. This is very important, especially with Google's recent changes in Core Web Vitals.
For SEO best practices and faster loading time images on your Tendenci web pages, it is important to update/change the "Source" slug of your images. How? Please highlight the entire slug and copy-paste it after your site's URL so you can navigate to the assigned unique URL for the image. This way, you can navigate from a web browser to find and download the image.
Example: /files/3978/ to https://www.yourwebsite.com/files/3978
That should take you to the exact URL of your media/files.
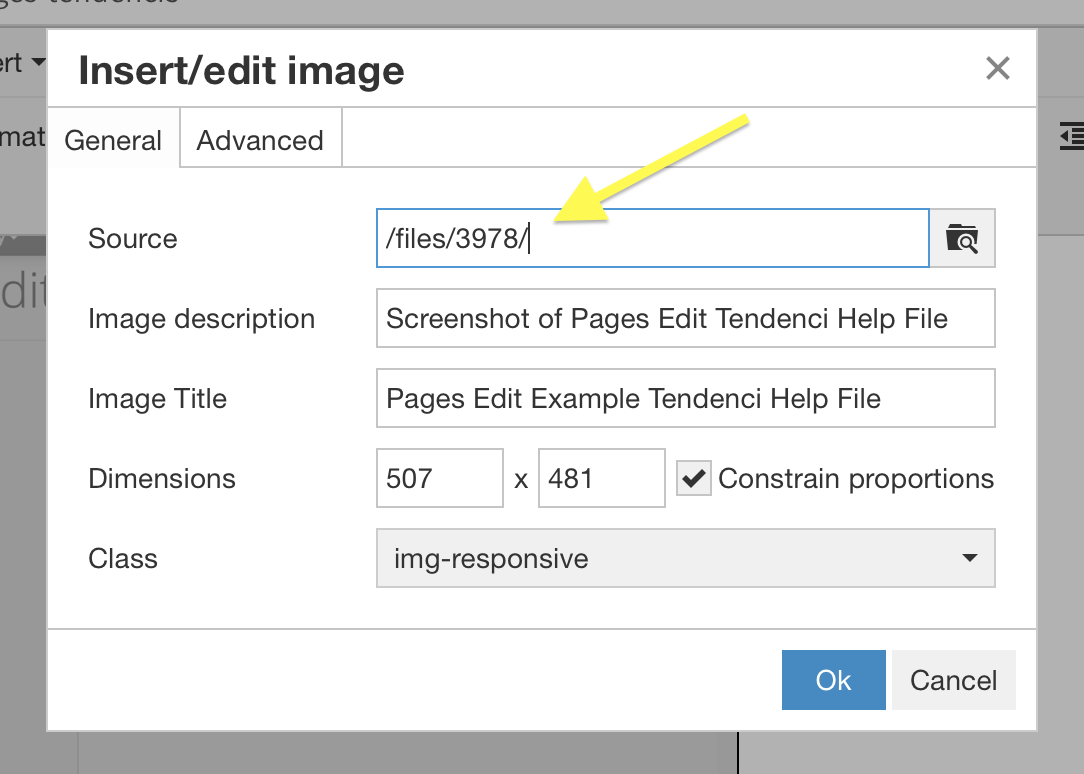
Highlight the entire slug starting with /media/files/... and make sure to paste it in the Source field.
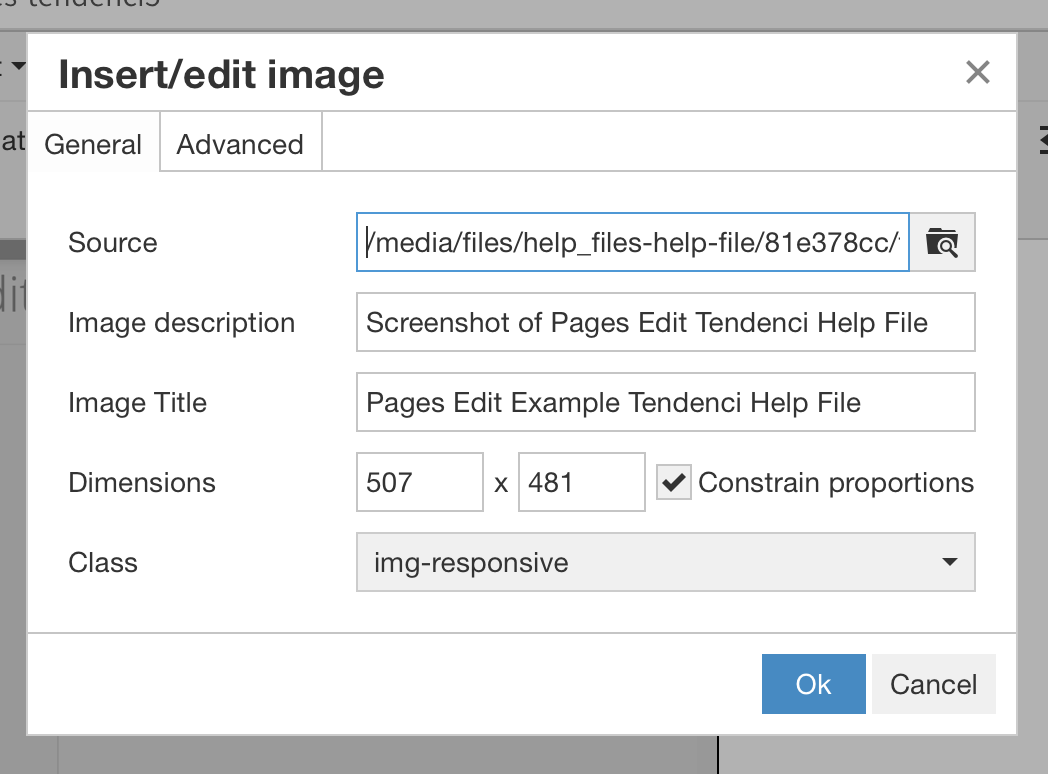
Please make sure for SEO best practices for your images and your overall website's health, to add proper context to the following fields (This is a great example of what we mean by SEO baked into the code):
- Image Description
- Image Title
- Class
Multiple Photo Upload
You can upload multiple photos with a "drag and drop" option. Go to your photos module https://www.yourwebsite.com/photos
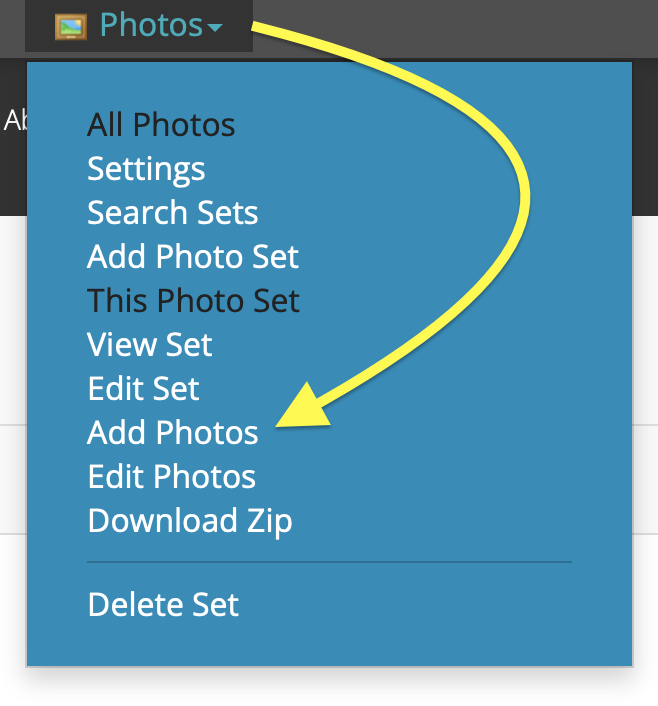
From there, select the photo set you want to add or continue adding photos to. Once an album is selected, look at the admin navigation menu and click on "Photos" and from that dropdown menu, you will select "Add Photos". Please see the images below.
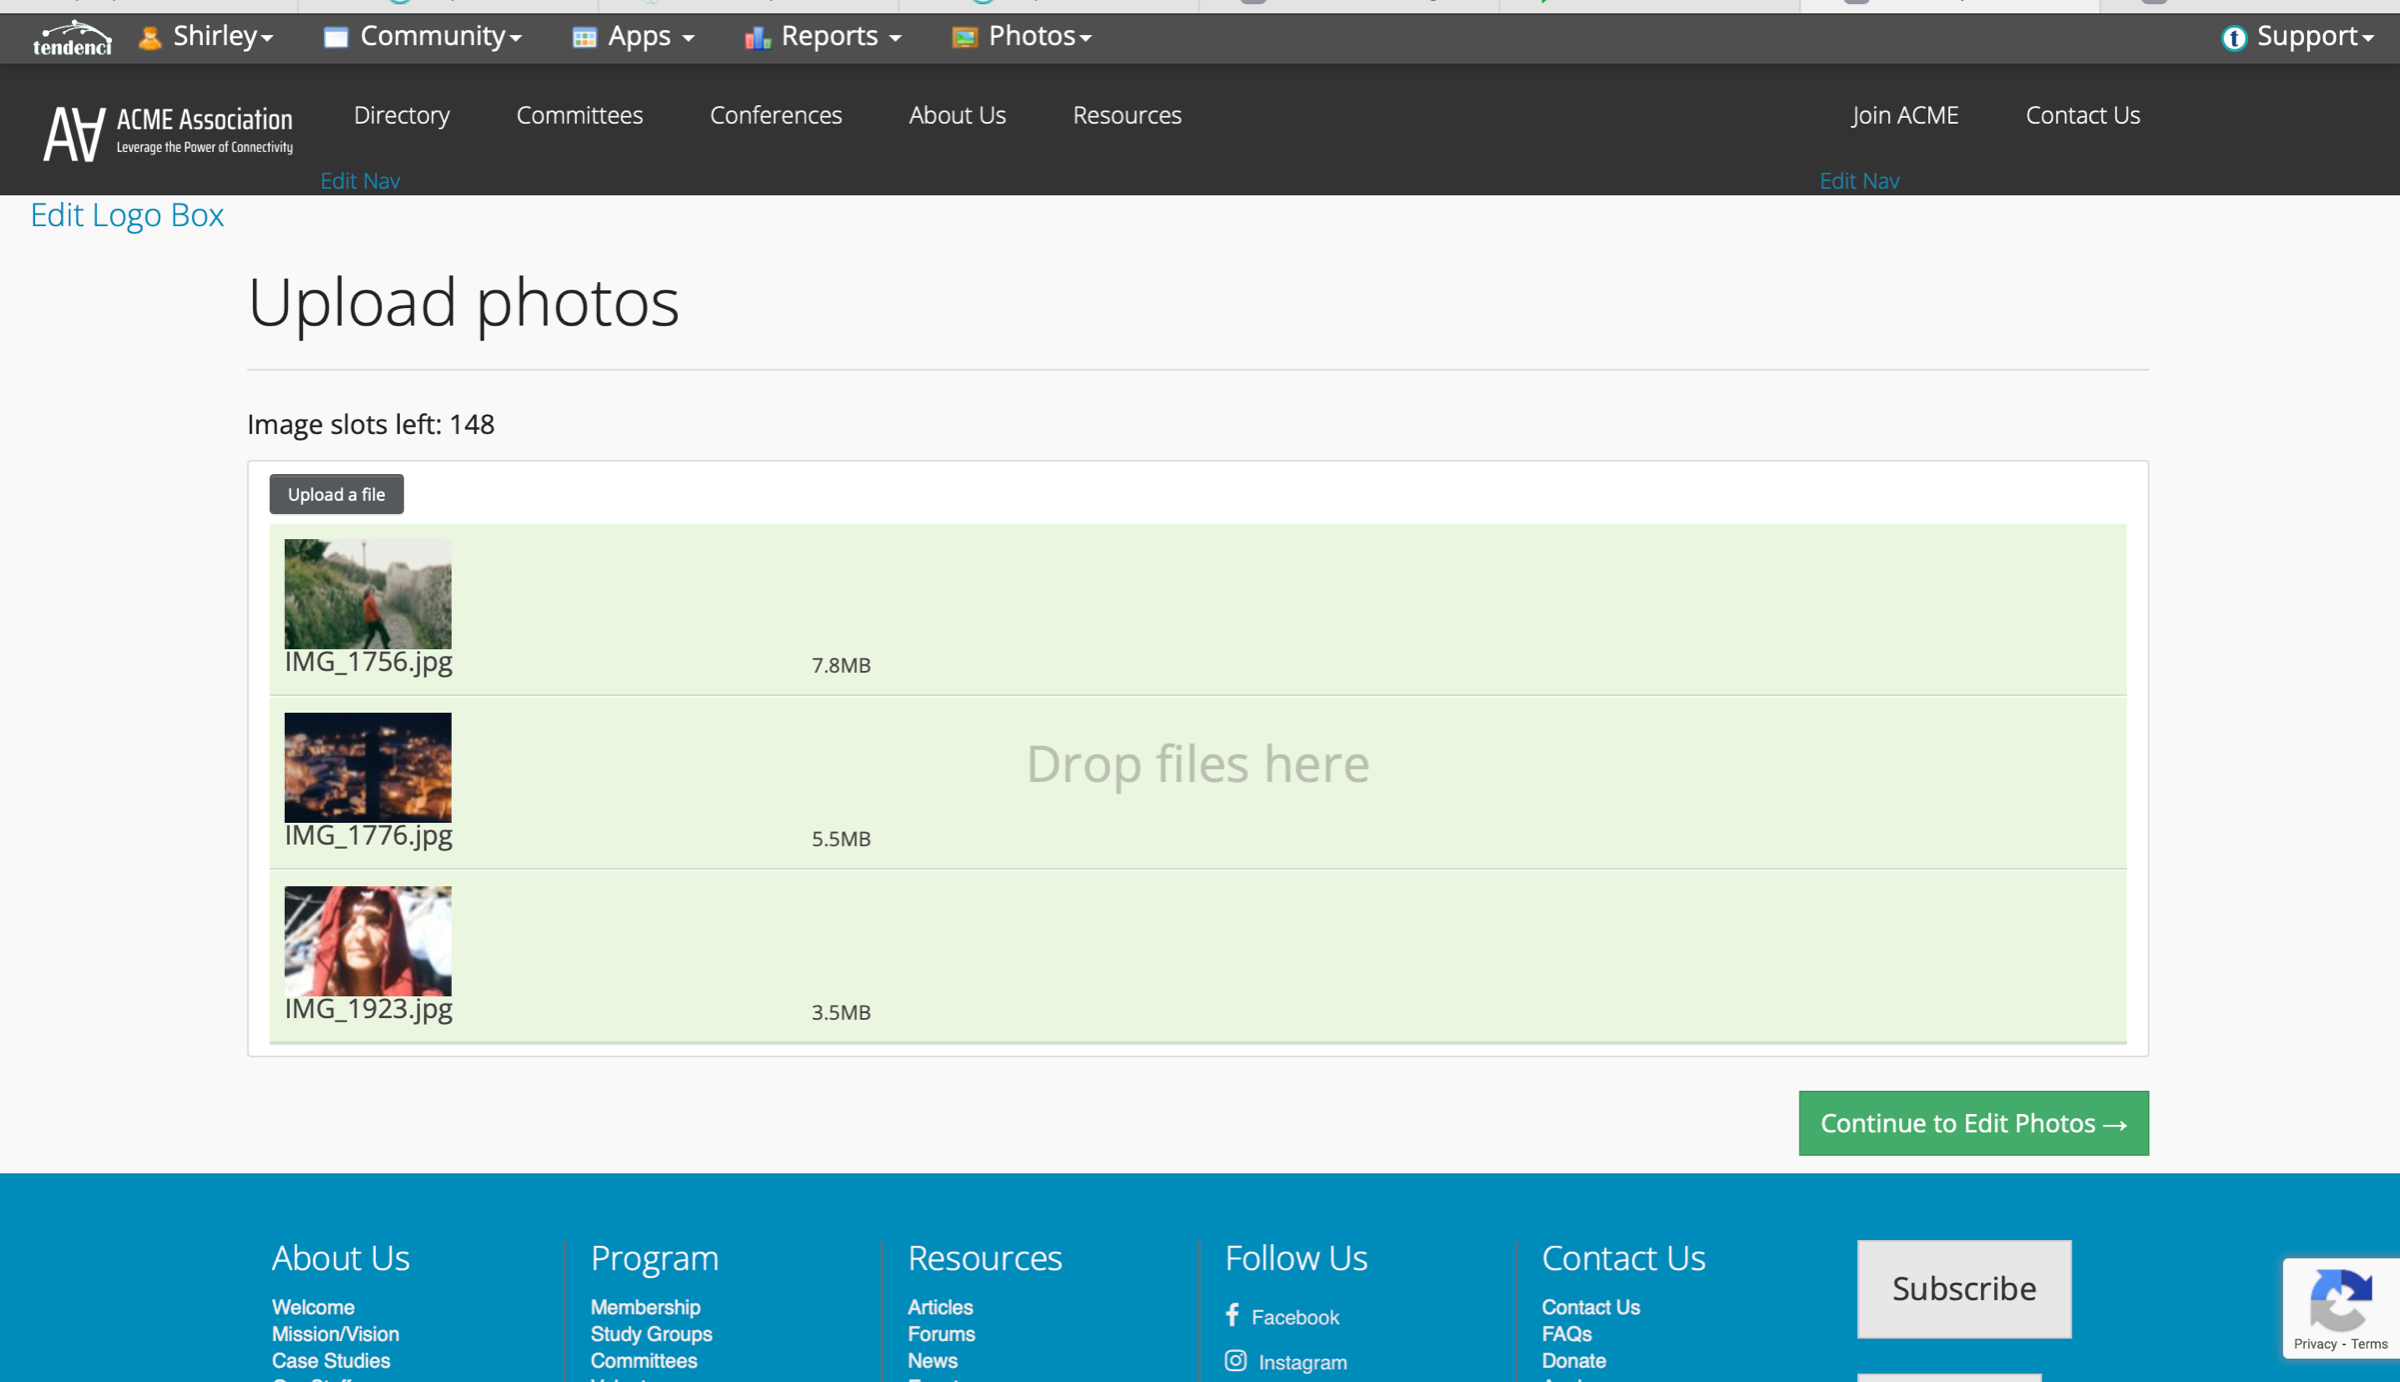
Drag and drop the images from your computer to the "Drop files here" box.
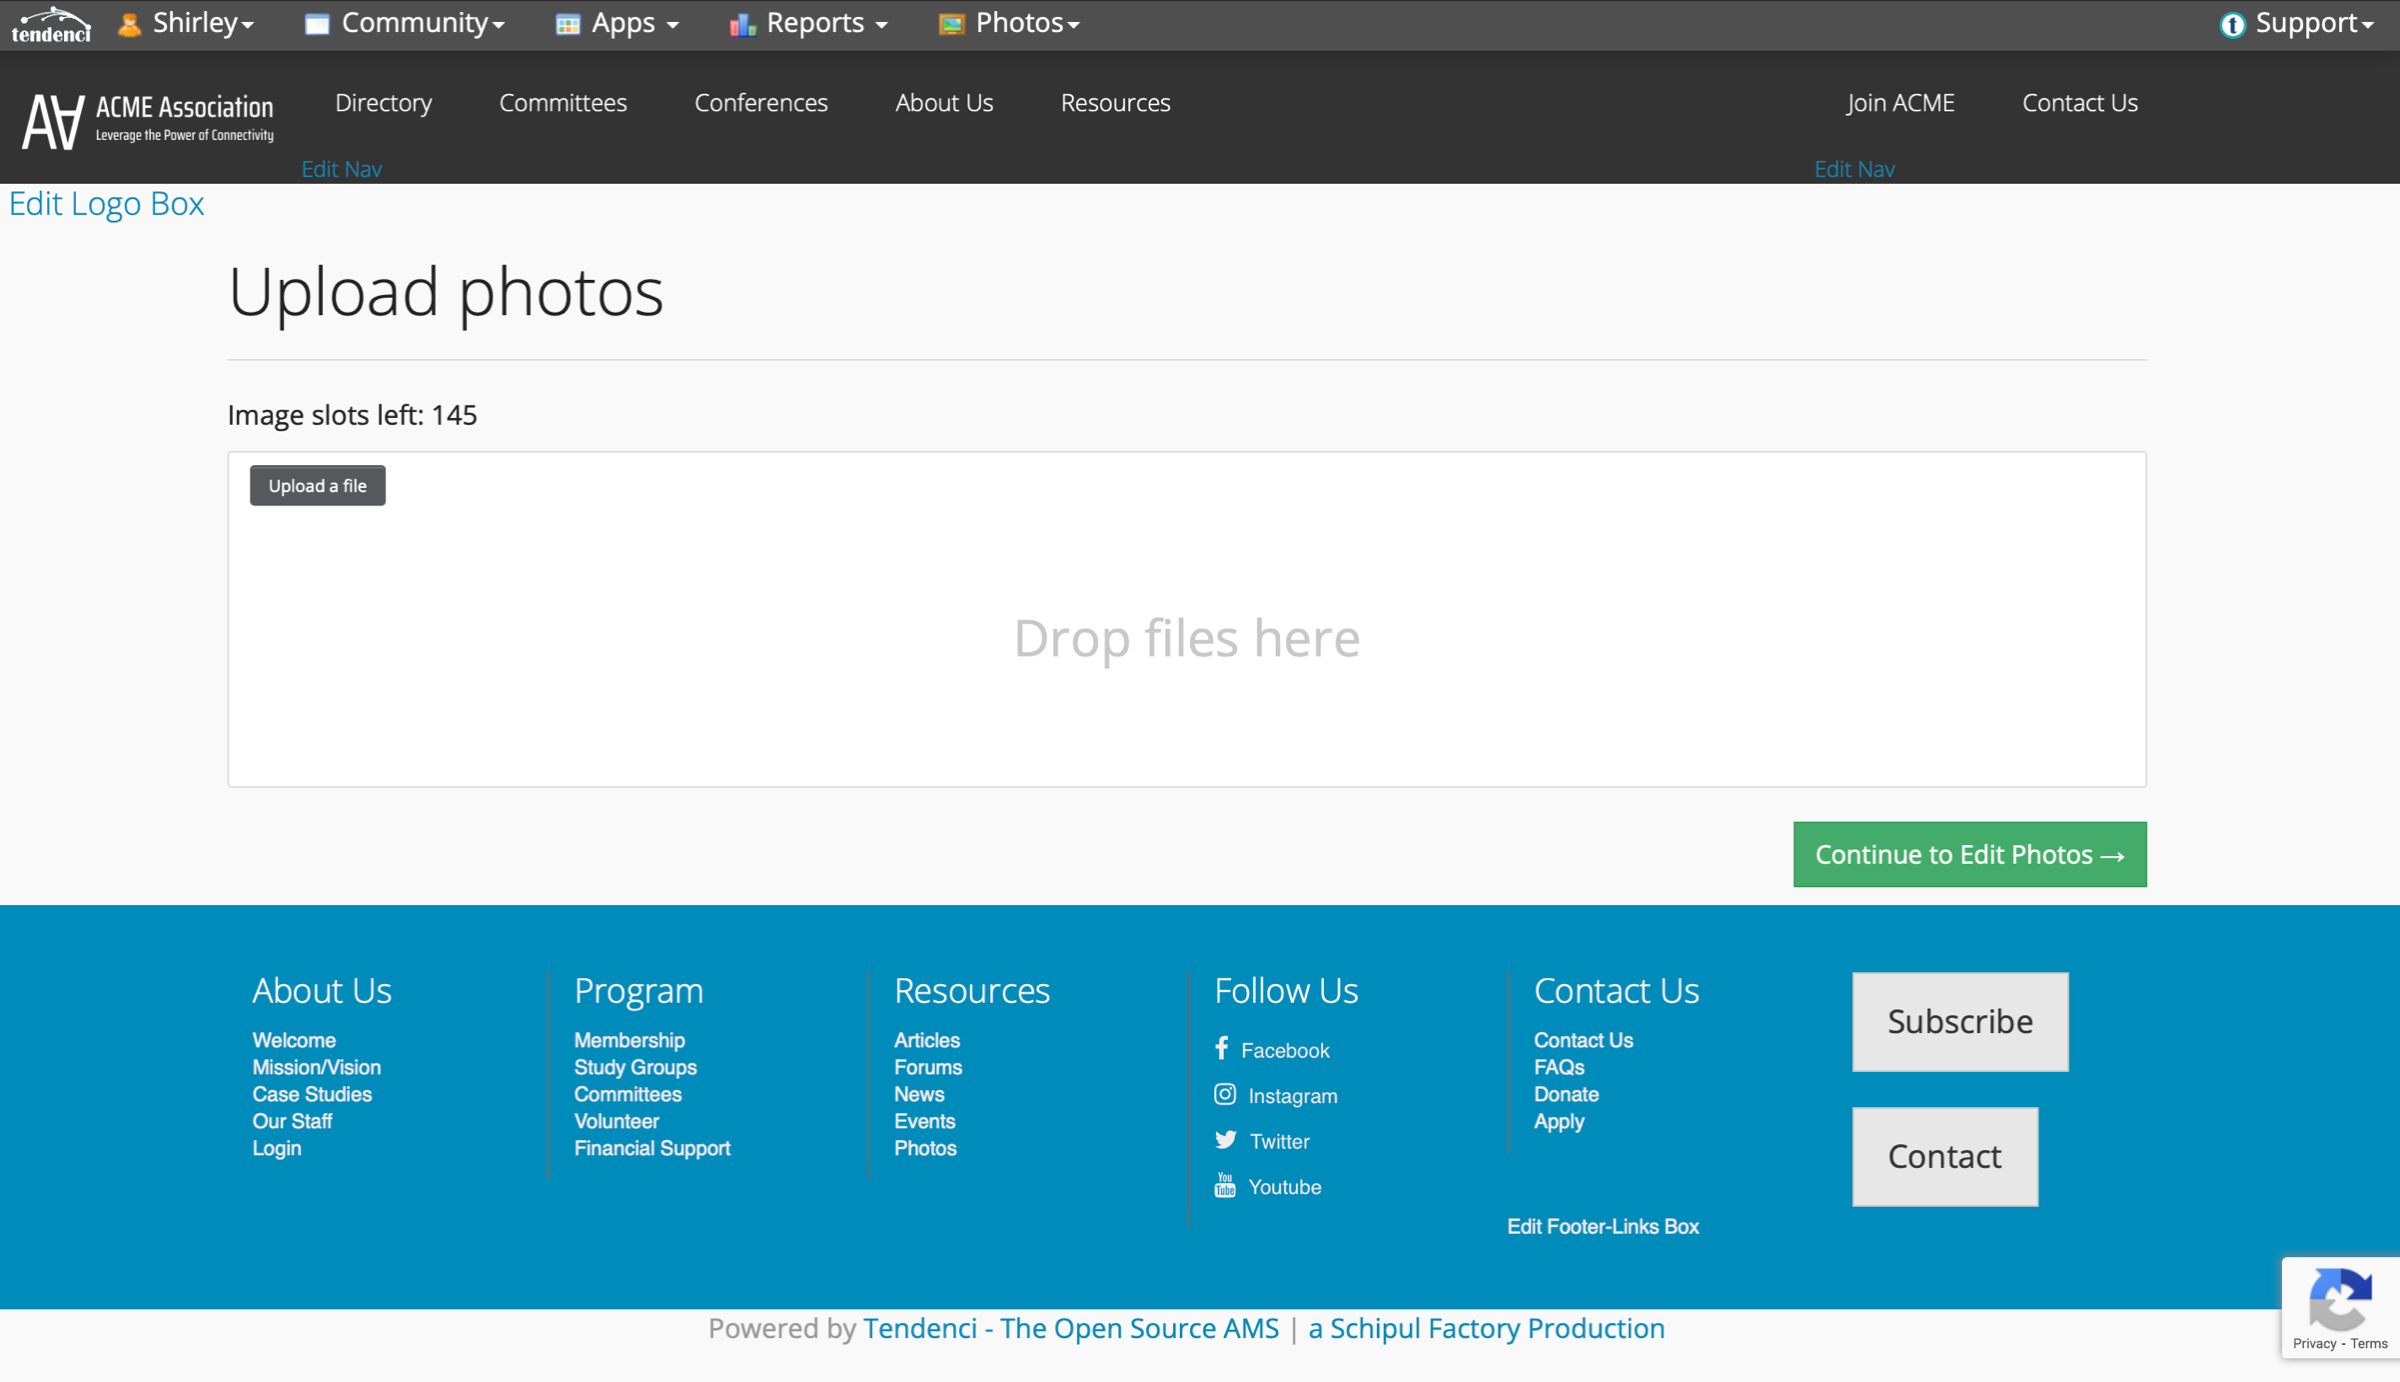
Click "Continue to Edit Photos" for individual photo edits or in bulk.
Embed an Existing Image File onto a Content Page
Use HTML to Embed the Image
Click on the WYSIWYG Editor's Source Code (HTML) icon from the edit page view where you want to add the image.
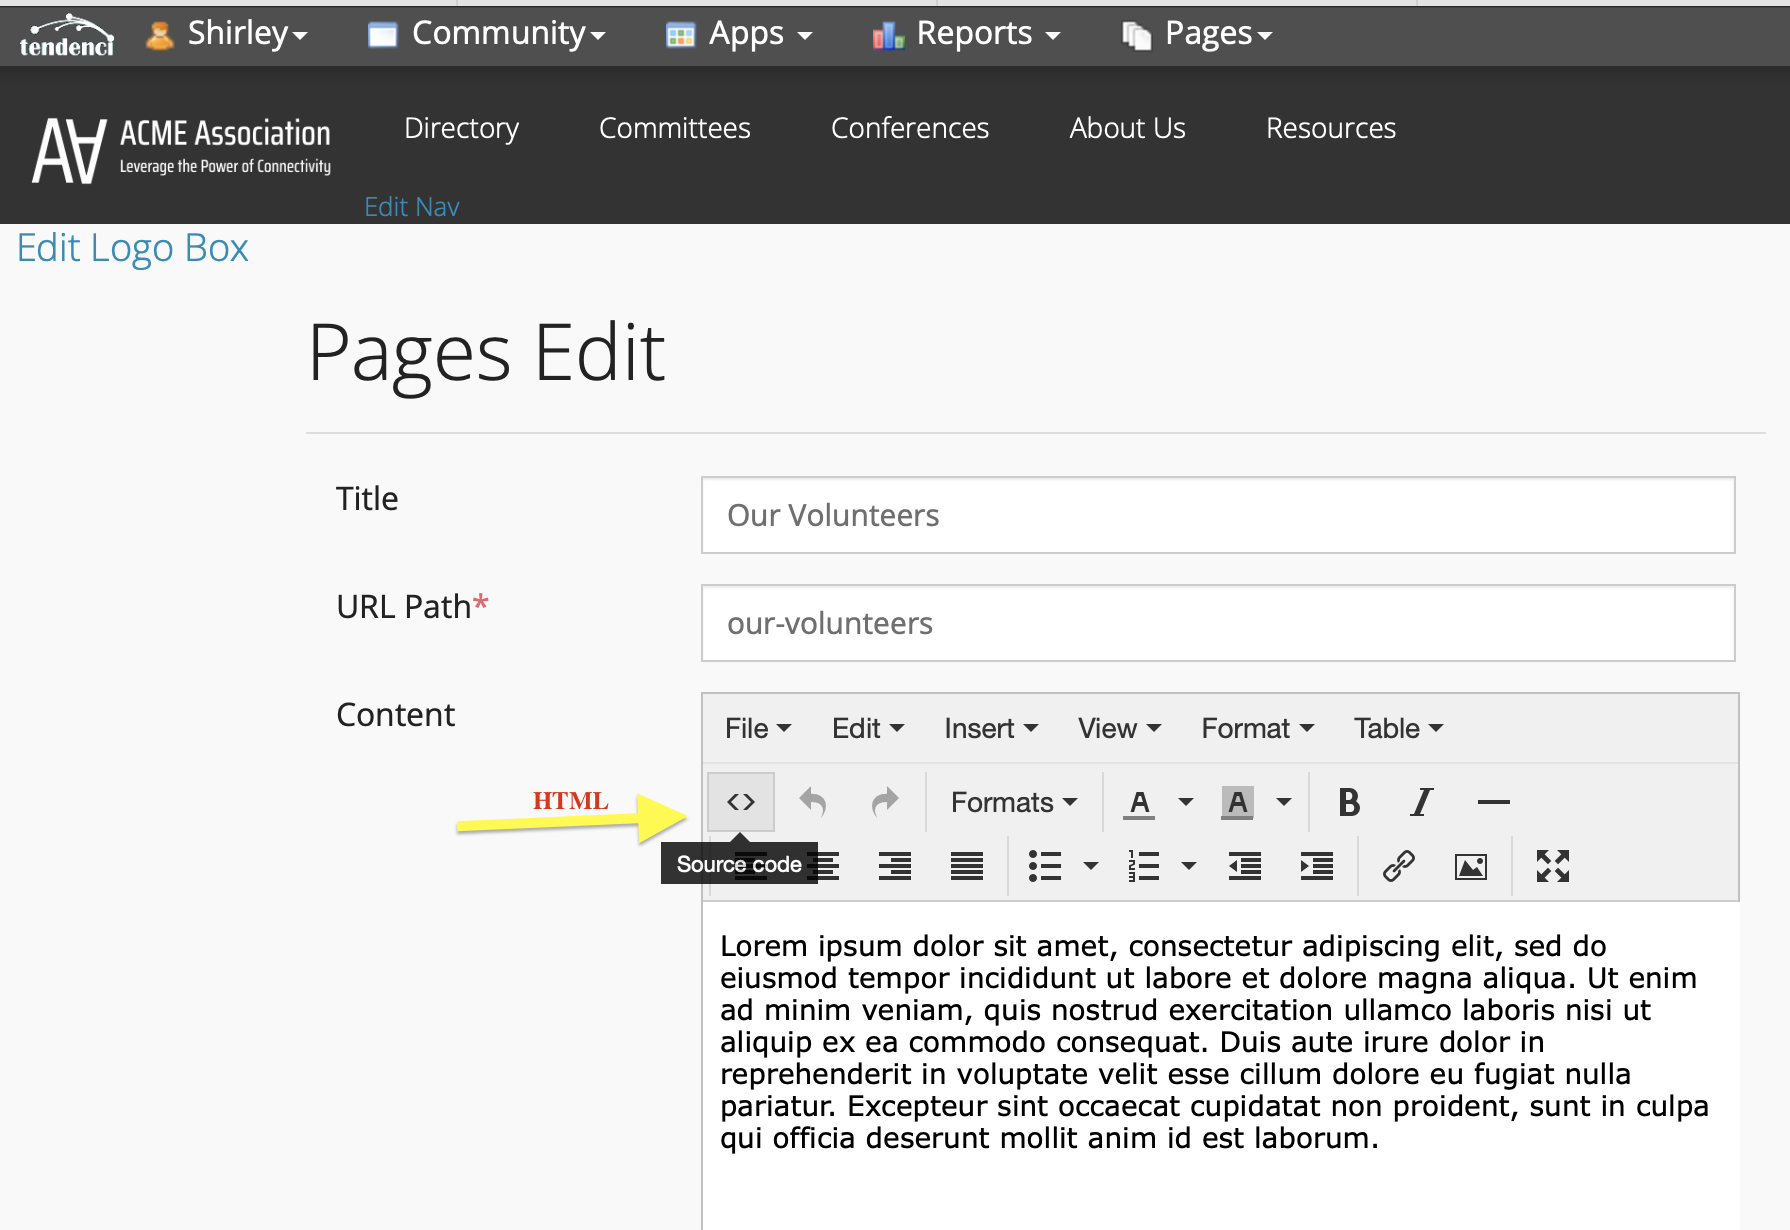
Then, you'll want to insert the HTML code and the Image File's unique URL to embed the image. This option requires basic knowledge of HTML. The sample HTML code you can customize with your image and website information is:
<p><img title="Image Title" src="/files/example-file-name/"/></p>
If you are familiar with using HTML, you can also add additional stylization including height and width for the image and positioning on the page.
Did this answer your question? If not, please contact our support team for more information.
